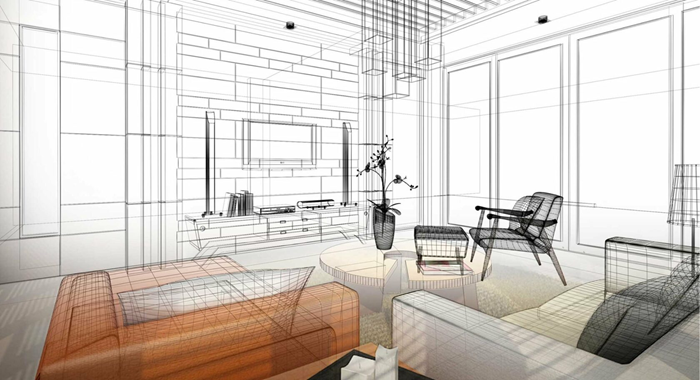
A 3D interior in architectural practice is not a «pretty picture,» but a tool for design thinking: it helps verify proportions, space usage scenarios, material compatibility, and lighting quality before construction begins. The more accurately the visual model reflects the future environment, the easier it is to coordinate the concept with the client and related specialists.
A strong 3D Interior rendering project is built on a balance of artistic expression and technical discipline: correct geometry, consistent naming standards, plausible materials, and controlled composition. Below are ideas that speed up the work and design rules that reduce the risk of revisions at later stages.
Technical Specification for Visualization: A List of Data Without Which the Scene «Won’t Come Together»
If even one of the key blocks is missing, the visualizer begins to «guess,» and the scene disintegrates into inconsistencies: scale, materials, lighting, furniture completeness, and even the layout logic become unmanageable.
Minimum Data Set for Technical Specifications
1) Geometry and Dimensions (What We’re Building)
- Room plan with precise dimensions: wall lengths, thicknesses, references, ceiling heights, level marks (if there are podiums/steps/level differences).
- Wall elevations/facades with references: openings, niches, projections, columns, box, radiators, utility lines hatches.
- Windows/doors: dimensions, sill heights, opening directions, frame/portal widths (if provided for by the project).
- Ceiling plan: ceiling types, cornices, niches, tracks, light fixture locations, heights of each level.
- Floor plan: layout diagrams, installation directions, thresholds/joints, levels.
2) Cameras and composition (what to show)
- List of camera angles (number and purpose): general view, accent zones, view of the kitchen unit, bathroom, and other units.
- Plan with camera marks and viewing directions, or screenshots with markup from the project author.
- Key constraints: what must be in the frame and what to exclude (e.g., «do not show the front door,» «need a view of the panel behind sofa»).
3) Materials and Finishes (what to cover)
- Finishing list by room/surface: floor/walls/ceiling/baseboard/moldings/decor.
- Links to specific materials (manufacturer/collection/article) or clear references with notes on the exact color/texture/gloss level needed.
- Texture sizes and scale: tile format, board width, slat pitch, panel module, stone pattern, vein direction.
- Layout patterns (if important): tile layout, herringbone, porcelain tile layout by axes, veneer pattern, joint joining.
4) Furniture, Lighting, and Equipment (what to fill)
- Furniture Specifications: Names, dimensions, references, heights, facade materials, and fittings.
- Built-in elements: kitchens, cabinets, panels, shelving – with drawings/sketches and key dimensions.
- Lighting plan: types of luminaires, locations, switching groups (if affecting the lighting scenarios), light temperature (K), desired light character.
- Plumbing fixtures/appliances: models or dimensional equivalents, finish (chrome/black/brass), important details (e.g., spout shape, sink type).
5) Style, mood, and rules for «how it should look»
- References for each key element (kitchen, TV area, bathroom, bedroom), with notes: what to use (color/composition/material/lighting), and what to exclude.
- Palette (primary and accent colors) and priorities: what should be dominant and what secondary.
- Prohibitions: «do not use warm wood,» «no unnecessary decor,» «no visible wires/boxes,» «do not add any personal items.»
6) Technical Requirements for the Result (What to Submit)
- Format and Size: PNG/JPG, resolution (e.g., 3000–5000 px on the long side), vertical/horizontal.
- Number of Frames and List: Which Frames are Final and Which are Intermediate.
- Deadlines and Stages: Date of First Previews, Date of Edits, Date of Final Submission.
- Edit Limit: How many iterations are included and what is considered an edit (composition/model/material/lighting).
- Color Corrector and «realism»: contrast level, «catalog/cinematic» look, whether a day/evening version is needed, whether a «clean» render without extensive post-processing is needed.
Results
A scene is only «assembled» when the specifications simultaneously define the geometry, cameras, materials, content, lighting, and result criteria. A complete specification saves time on clarification, reduces the risk of discrepancies with the project, and turns visualization into a manageable process rather than a chain of guesses and endless edits.